The System File Checker or sfc.exe is a utility in Microsoft Windows located in C:\Windows\System32 folder. This utility allows users to scan for and restore corrupt Windows system files. In this post, we will see how to run System File Checker and also see how to analyze SFC logs.
System File Checker
In Windows 10/8/7/Vista, the System File Checker is integrated with Windows Resource Protection, which protects registry keys and folders as well as critical system files. If any changes are detected to a protected system file, the modified file is restored from a cached copy located in the Windows folder itself.
So if at any point of time if you find that you have hacked some system files or maybe applied some tweaks or replaced system files, maybe while customizing your Windows, and you now find that your Windows is not working properly, you may want to consider running this utility first, before trying a System Restore. To do so, you will have to first open an elevated command prompt window.
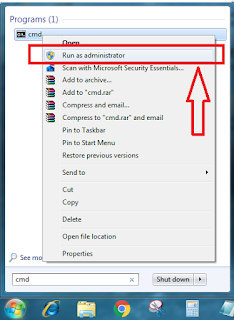
To run the System File Checker in Windows 10/8/7, type cmd in start search box. In the result, which appears, right click on cmd and select Run As Administrator.
Run sfc /scannow
In the command prompt window which opens, type sfc /scannow and hit Enter.


No comments:
Post a Comment